(german version)
Unreal Landscapes 101 - Part 02 - Blender 3D Map
What to create
In essence, we take a cube and displace on side with a height map exported from a Gaea project. The creation of a landscape in Gaea and how to export height maps and texture has been shown in part one of this series.
For this, we create several artefacts in Blender as shown below:
- Vertices Group 'LandscapeVertices': All verticesl that wil be displaced later and textured with the exported landscape surface texture
- Vertices Group 'SocketVertices': All vertices that belong to the 'socket' - textured with a rock like texture
- Material 01: Exported landscape surface texture
- Material 02: A socket texture like Granit - we use a texture from Polyhaven here
- Texture: Exported Landscape heightmap to act as Displacement Map
- Lighting: A HDRI light map from Polyhaven
tip
You can download all textures and the Blender final source file at https://bit.ly/3dMap! If any textures are shown in magenta in Blender, then the paths are messed up and you simply must open the regrading texture files again from the regarding Blender properties.
The process
Geometry
- Create & Subdivide Cube
- Menu 'Layout' → Right Panel → 'Object' tab → scale x 10, scale y 10, scale 2
- Click 'Z' indicator until '+Z' is in the middle
- Press 'Tab' to switch to Edit Mode (or use dropdown top left)
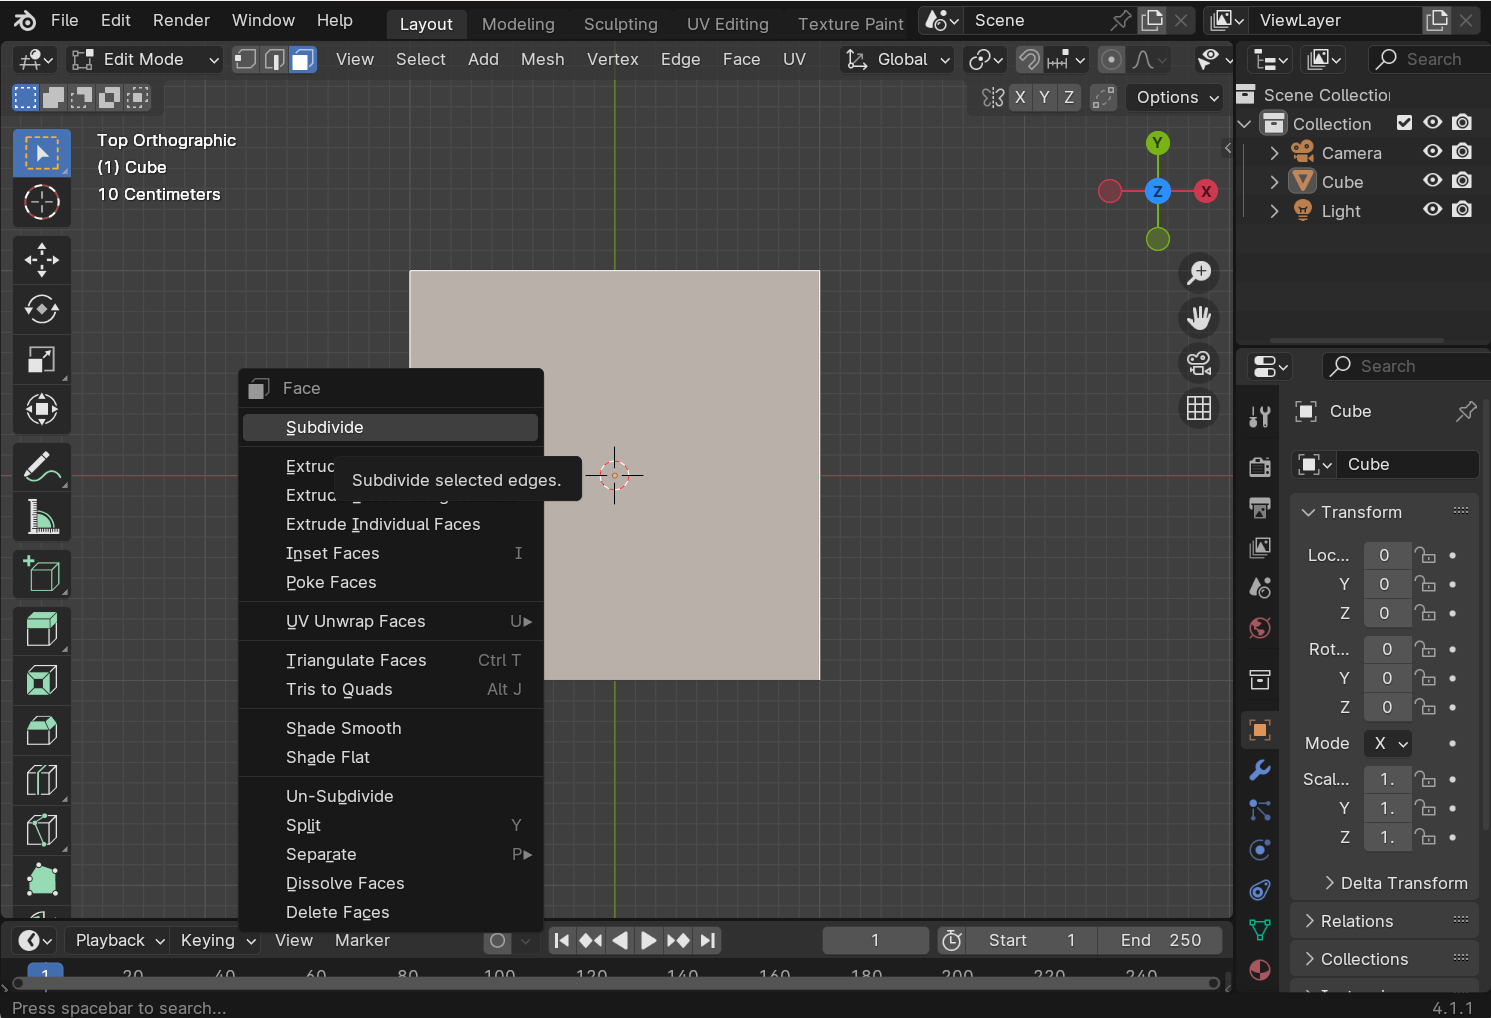
- Switch to 'Face Select' (third button right from 'Edit Mode' dropdown)
- Right click on cube, select 'Subdivide'
- Open Subdivide form on bottom left, 'Number of Cuts' 100
- Right click on cube again, select 'Subdivide'
- Open Subdivide form on bottom left, 'Number of Cuts' 2 (the more the better - but careful here as Blender will crash if you put that too high)

- Create Vertex Selection Groups
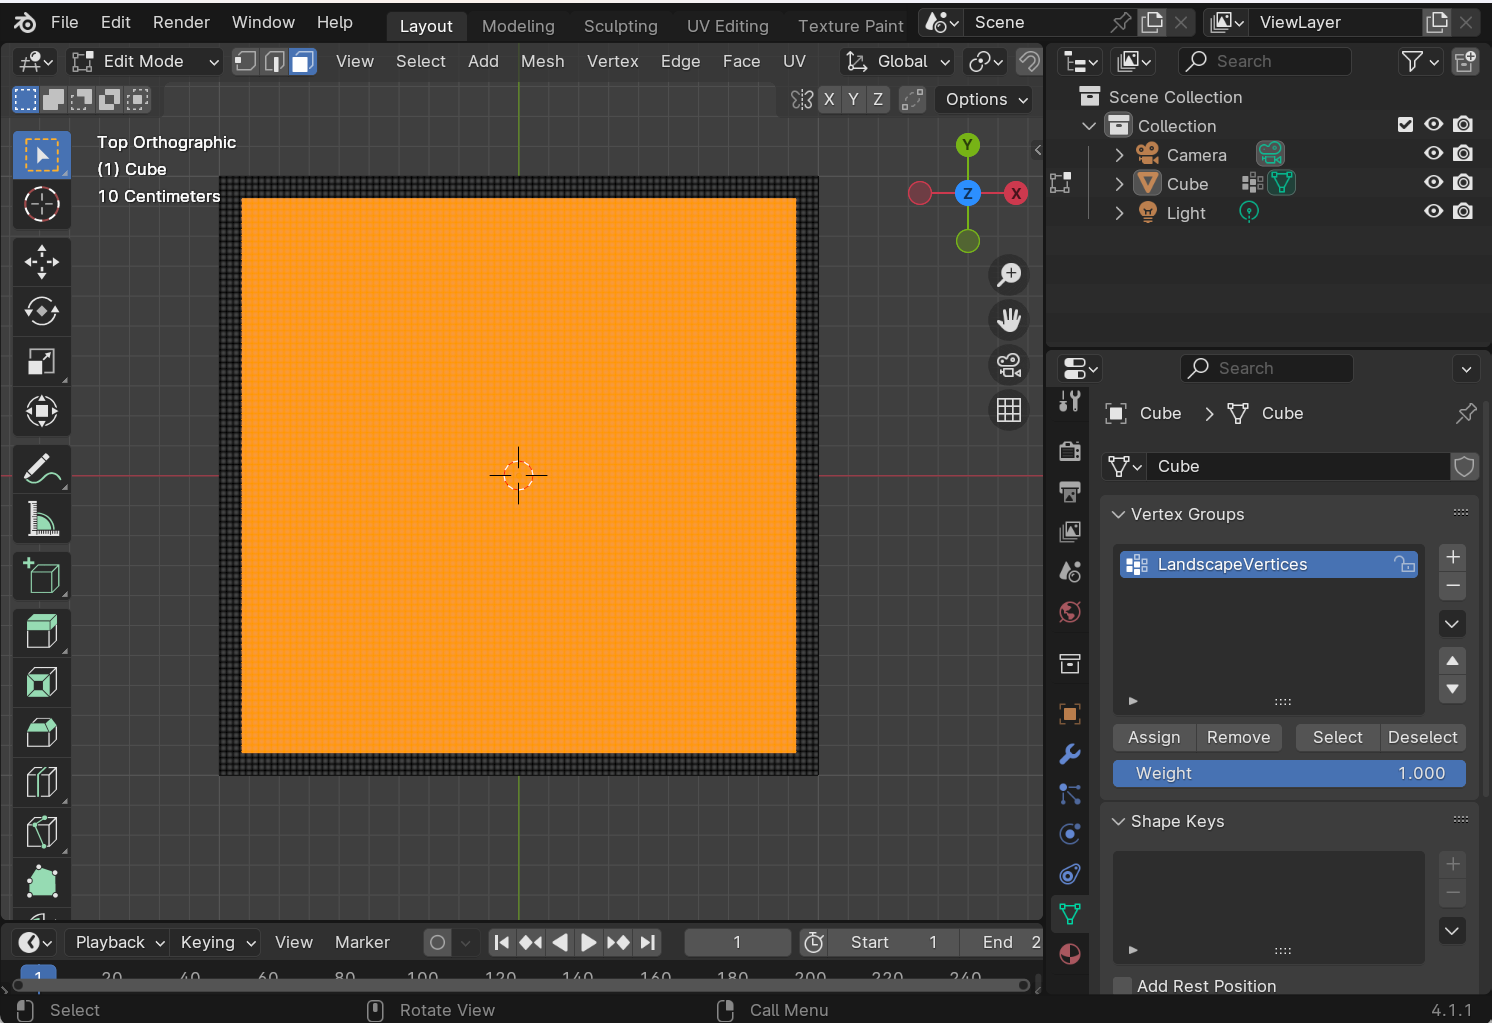
- Vertex Group 'LandscapeVertices'
- Choose 'Select Mode' = 'Face Select' (top left, second menu, third box right of 'Mode' dropdown)
- Drag frame around cube - will select only this side of the cube (check through rotating the cube a bit with middle mouse button pressed - then back to 'Z' view)
- Press Ctrl-NumMinus to decrease selection (or sedcond menu - 'Select' → Select More or Less → Less): We should have a nice ridge around our landscape later
- Right Panel → Data → Add Vertex Group → double click on name and rename 'LandscapeVertices' →
- Click 'Assign' to assign current selection to this group
- Choose 'Select Mode' = 'Face Select' (top left, second menu, third box right of 'Mode' dropdown)
- Vertex Group 'LandscapeVertices'
- Vertex Group 'SocketVertices'
- Create a selection of all other vertices
- Press 'A' to select all vertices
- Right panel 'Data', 'LandscapeVertices', 'Deselect'
- Create new Vertex Group ('+'), rename it to 'SocketVertices' and press 'Assign'
- Create a selection of all other vertices

Materials
- Create Materials: Menu 'Shading'
- Create new Material (middle '+ New')
- You will see it in right panel 'Material' - rename to 'M_Socket'
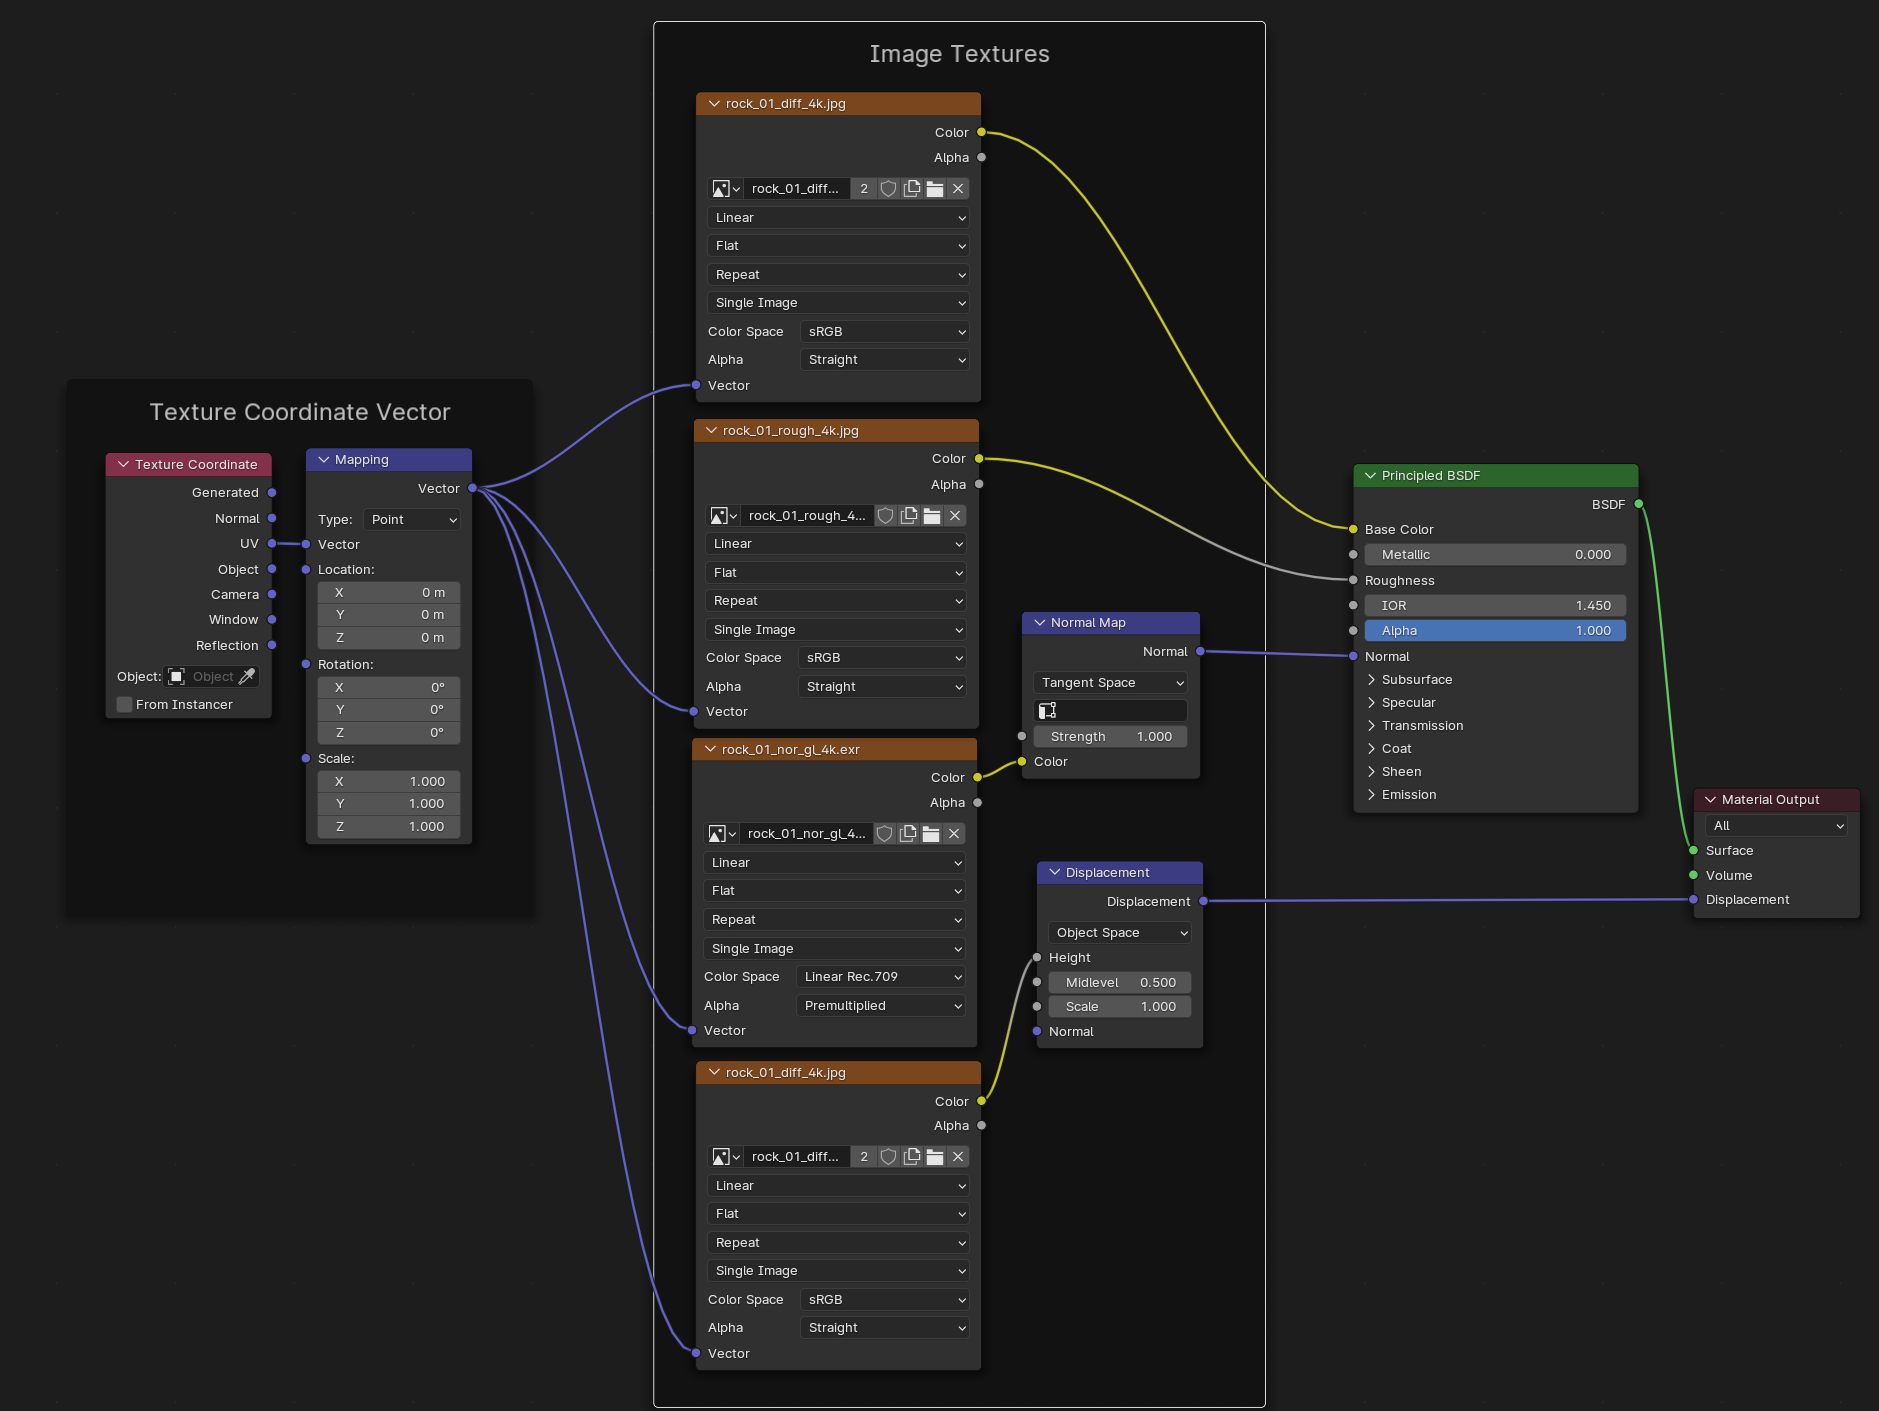
- Texture Nodes
- 'Image Texture' node → Color Image → Base Color of BSDF (Bidirectional Scattering Distribution Function - Blender's Physically-Based-Rendering-Shader (PBR) implementation)
- 'Image Texture' node → Roughness Texture → Roughness of BSDF
- 'Image Texture' node → Normal Texture → Color to Color of a 'Normal Map' → Normal of BSDF
- 'Image Texture' node → Displacement texture → Color to Height of 'Displacement Map' → Displacement of Material Output
- Texture Coordinates
- 'Texture Coordinate' node → UV to Vector of 'Mapping' node → Vector OUT connects all vector IN of all textures nodes
- Create new Material (middle '+ New')

- Create new Material (middle '+ New')
- You will see it in right panel 'Material' - rename to 'M_Landscape'
- Texture Nodes
- 'Image Texture' node → Color Image → Base Color of BSDF (Bidirectional Scattering Distribution Function - Blender's Physically-Based-Rendering-Shader (PBR) implementation)
- 'Image Texture' node → Gaea Water Texture → Roughness of BSDF
- 'Image Texture' node → Gaea Normal Texture → Color to Color of a 'Normal Map' → Normal of BSDF
- 'Image Texture' node → Displacement texture → Color to Height of 'Displacement Map' → Displacement of Material Output
- Switch to 'Edit Mode' (Tab) → go to right panel 'Data' → select your 'LandscapeVertices' → click 'Select'
- Go to right panel 'Material' → select 'M_Landscape' → click 'Assign' to assign it to the selected vertices
Displacement Modfier
- Add displacement
- Create HeightMap Texture
- right panel, 'Texture' → 'New' → 'Open' and select your heightmap → rename to 'T_LandscapeHeightMap'
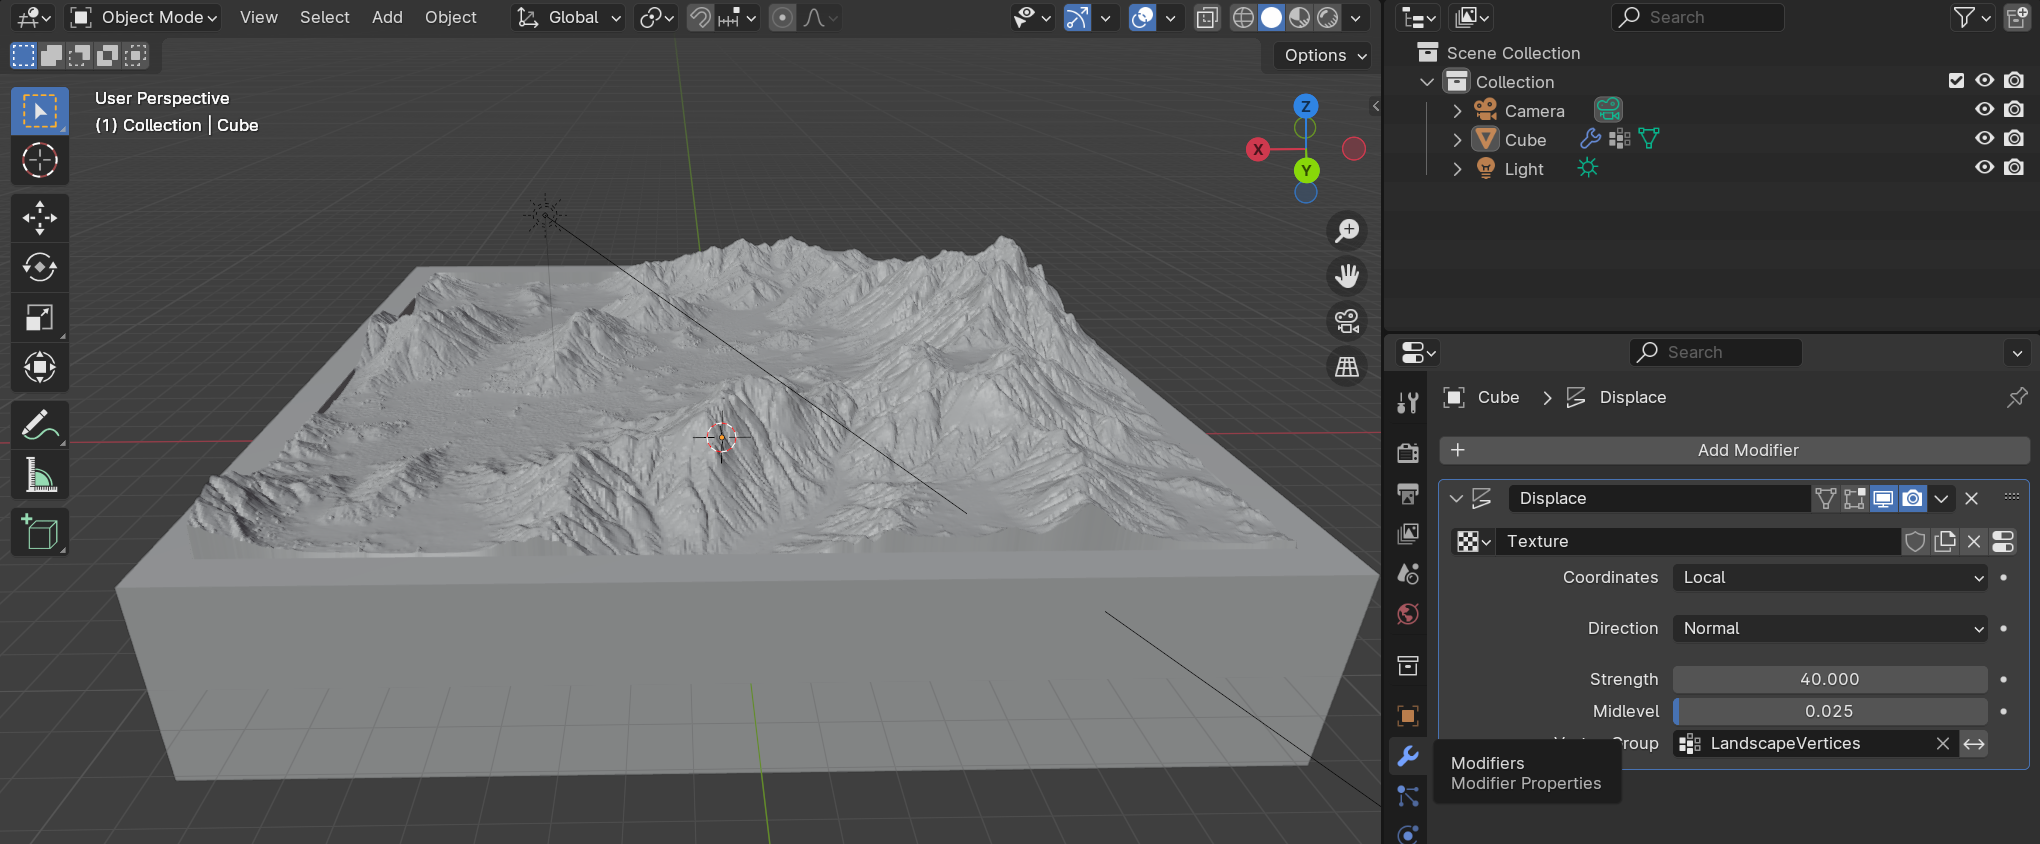
- right panel → 'Modifiers' → 'Add Modifier' → 'Displace'
- Select your 'T_LandscapeHeightMap' texture
- Select your 'LandscapeVertices' as Vertex Group
- Adjust the Displacement Modifier:
- Midlevel a bit above zero
- Strength depending on your heightmap - normally 20-50 should work
- Create HeightMap Texture

Texturing
- Texturing
- Switch to Edit mode (Tab)
- Apply Landscape Material
- left panel, go to the 'Data' tab → select 'LandscapeVertices' → 'Select'
- switch to 'Material' tab → select 'M_Landscape' → 'Assign'
- Apply Socket Material
- left panel, go to the 'Data' tab → select 'SocketVertices' → 'Select'
- switch to 'Material' tab → select 'M_Socket' → 'Assign'
- UV Stretch fix landscape
- Menu 'UV Editing'
- Select the LandscapeVertrices that might be stretched, then:
- Right click → 'UV Unwrap Faces' → Smart UV Project → 'Ok'
- Select the LandscapeVertrices that might be stretched, then:
- Menu 'UV Editing'
- UV Stretch fix sides:
- Menu 'UV Editing' → Edit mode
- Select one side (right window) → click in left Window where you see the texture
- Press 'a' to select the boundaries of your texture → scale, rotate and move accordingly - you will see the texture updating in real time
Lighting
- Lighting
- right panel → 'World'
- click 'Color' → select 'Environment Texture'
- 'Open' a Sky HDRI image, e.g. from Polyhaven
Camera
- Camera
- Select the Camera from the scene collection
- Modify your viewport
- Select lower menu 'View' → 'Align View' → 'Align Active Camera to View'. Or press Ctrl-Alt-Num0
- Press NumPad zero - or select 'View' → 'Cameras' → 'Active Camera'
- lower right panel → 'Camera' → set 'Focal Length' as needed for picture composition
tip
You can very easily create a turntable animation with the Blender plugin 'Turnaround Camera'